toolboy's Corner: Rebuilding Ryobi 18v Batteries

Click here to check out all of toolboy's items for sale on eBay


Main Page    18v Batteries    Battery Chargers    Cordless Tools    Battery Rebuilds, etc. The Ryobi P102 Battery
NEW!   Circular Saw Battery Test


So you have some older Ryobi 18v batteries that are no longer working as well as they used to. You guess the best thing to do is to buy some new batteries -- from The Home Depot or on eBay. Or you could buy some reconditioned batteries from one of a variety of sources. Or, if you're skilled with a soldering iron, you could rebuild the packs yourself.

Over the years I've rebuilt numerous battery packs and replaced the "non-replaceable" batteries in various devices. Sometimes I've done this because it's the cheapest option, but more often it's because I wanted to upgrade to higher capacity cells.

If you're not skilled with a soldering iron and knowledgeable about the cell technologies used, please do not try this yourself.

Some points to consider before rebuilding a pack:

Which is correct: "NiCd" or "NiCad"?

Technically, "NiCd" is correct. From the Periodic Table of the Elements, "Ni" stands for Nickel and "Cd" for Cadmium. Putting these together gives "NiCd" for Nickel Cadmium, the chemistry of these cells.

The abbreviation "NiCad" is a registered trademark of SAFT Corporation, although this brand name is commonly used to describe all nickel-cadmium batteries.

But I really wanna replace the cells in my NiCad pack!

OK, so do it! The NiCd packs each contain fifteen Sub-C cells. You can buy new Sub-C cells with solder tabs in capacities up to 2200mAh. The older black packs contains 1500mAh cells and the newer yellow packs contain 1700mAh cells, and I recommend not buying cells with a lower capacity that the originals. I'm not going to talk you through disassembling your pack, rewiring, and reassembling, but I'll say that, having done it several times, it's not too difficult. I find it easiest to remove the old cells and set them aside to look at as an assembly guide (remember there's one in the "stem"). I like to "aim" the solder tabs so that each positive tab "aims" towards the center of the next cell's negative, and I double over the negative tab to solder the previous cell's positive to it. Before bundling and soldering, tape the thermistor (or whatever type of temp sensor it is) to one cell, and arrange 14 new cells of the pack as they're going to fit in the shell. I like to stick them together with tape or hot melt glue -- makes them easier to handle before soldering.

The 2200mAh NiCad cells have 29% more capacity than the original yellow P100 pack, and generally have a higher discharge rate so tools feel more powerful, though YMMV.

The heck with NiCad packs, I wanna rebuld my Lithium Ion pack!

Not so fast, bub. Read above about cell selection. No battery likes to be overcharged or overly discharged, but doing so to Lithium Ion cells can really be disastrous. Lithium Ion cells will become irreparably damaged if discharged too much, for most 18650 cells it's around 2.8v. And they'll explode nicely if overcharged, for most the maximum is 4.2v. Many 18650 cylindrical cells are assembled at the factory with a protection circuit built right into the "button" of the cell. The circuit automatically disconnects the battery if the voltage goes over or under the "safe" range. The Ryobi packs use "unprotected" cells and instead utilize complex circuitry within the battery pack itself to manage this. If you have P103 or P104 packs you may have noticed this behavior already -- while operating a tool with a Lithium Ion battery near the end of its charge the tool stops abruptly. By contrast, the same tool operated by a P100 NiCad pack will slow down significantly as the battery nears the end of its charge, perhaps even "crawling" along for awhile before it finally stops.

At this time (Dec 2009) the highest capacity 18650 cells I've been able to find with suitable charge/discharge characteristics for use in P103 or P104 packs are rated 1600mAh, and they can be purchased for maybe $10 each plus shipping in small quantities. Do the math -- assuming $7.50 to ship 5 or 10 cells that's $57.50 to rebuild a P103 or $107.50 to rebuild a P104. The Home Depot sells new P103 Packs for $49.97+tax and P104 packs for $89+tax, so while you'd get a little more capacity doing the rebuild yourself it's cheaper, easier, and safer to buy new.

You're still reading on, so you must still be interested. And yes, I've rebuilt both P103s and P104s. I rebuilt one P103 using Tenergy 2600mAh 18650 cells. I carefully marked this pack, set it aside for use only with flashlights and fans, and sure enough it outlasts P104s in these tools. For the P104 rebuilds I decided that buying and assembling individual cells was too expensive and too much of a hassle, so I started looking into what cells are used by Ryobi's competitors. See this thread in the DeWalt Owner's Group for an informative discussion on this topic. The bottom line is that the Makita BL1830 is the most cost effective pack, containing ten 1500mAh cells for $99 (that's $9.90/cell). I found a vendor on Amazon.com selling these for about $65 each, so I ordered two. The Makita BL1830 packs came apart easily. The Sony cells inside were already arranged and wired as needed for use in the P104 shell, though spaced more closely so fitting them in P104 shell was just a tad tricky. Nonetheless, in about an hour I converted two dead P104s into two 3.0AH P104s, 25% more capacity than the original packs!

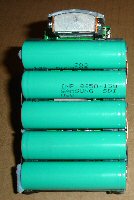
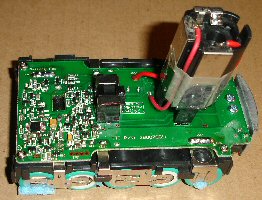
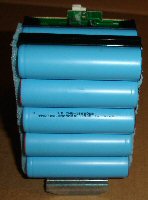
Let's see what the inside of the P103 and P104 batteries look like.


Can I rebuild one pack using the cells from another pack?

Yes. However, it's unwise to replace just one bad cell in a pack because the replacement cell is unlikely to be a match for the other worn cells. This imbalance will likely result in poorer-than-expected performance and a sooner-than-expected end-of-life for the pack. But this technique could be used to make a few working batteries from a stack of non-working packs.

Actually I did a rebuild very recently. Following the 2014 Holiday Season, Ryobi deeply discounted the P122 kit (2x P108 batteries). The price was so low that I decided I could sacrifice one new P108 to rebuild a couple of old P103 batteries. I did learn a few things along the way. First, I discovered that the P108 contains ten Samsung INR18650-20Q cells. The Samsungs are very high quality cells, they were used in the P103 batteries, and they've consistently tested higher than their rating. It's no surprise that the P108s have tested very favorably. The second thing I learned is that it's far more difficult and dangerous to disassemble a P108 than to disassemble a P104. The P108 has a plastic infrastructure around the ends of the cells on either side which was not present in the P104 and which greatly complicates the removal of cells. Using a pocket knife to slice the battery tabs, I managed to momentarily short the cells several times. Very dangerous! But eventually I was able to remove the lower five cells, and then I soldered them into place within an old P103 pack. Now I have a compact battery with a 2000mAh/36Wh rating, which is 50% more than the P102/P103! For now I re-assembled the P108 as-is, so I have a second 2000mAh/36Wh pack. I wonder why Ryobi doesn't put these Samsung INR18650-20Q cells in the P107?

Has anyone ever actually tested the capacities of these packs?

Yup, I sure have. I have a West Mountain Radio CBA II and I've tested all my packs at the 1C rate (e.g., P100 capacity is 1700mAh, so it was tested at 1700mA rate). There's no telling how many charge/discharge cycles each of these packs has gone through, though it's a safe bet that older packs have seen more use. I originally generated results in late fall 2009, then re-tested the same batteries about a year later in November 2010, then again in January 2012.

Model Date Code Rated (mAh) Fall 2009
Measured
% Rated Nov 2010
Measured
% Rated Jan 2012
Measured
% Rated Comments
1322401G0424 1500 849 56.6% 476 31.7% DEAD 0.0% Discharge curve contained several stair-steps, probaby indicating bad cells
P100 BD0537 1700 777 45.7% 548 32.2% DEAD 0.0% Stair-step in discharge curve indicates bad cells.
P100 G0432 2200 1487 67.6% 1288 58.6% 744 33.8% A rebuild. Stair-step in discharge curve indicates bad cells.
P103 CS0849 1300 1319 101.5% unkn unkn unkn unkn A rebuild - replaced 1 cell from another P103
Could not re-test, gave it to my mother.
P103 0829 1300 1261 97.0%         Was left in the rain and died. R.I.P.!
P103 CS0842 1300 1313 101.0% 1227 94.4% 1204 92.6%  
P103 0831 1300 1272 97.8% 1253 96.4%  
P103 CS0842 1300 1317 101.3% 1251 96.2% 1217 93.6%  
P103 CS0849 1300 1122 86.3% 1070 82.3% 909 69.9% A rebuild - replaced 1 cell from another P103
P103 CS0849 2600 2058 79.2% 2123 81.7 1970 75.8% A rebuild - Tenergy 2600mAh cells
P104 G0736 2400 1736 72.3% 945 39.4% Factory Refurbished
P104 G0747 2400 2300 95.8% 1922 80.1% 1820 75.8% Factory Refurbished
P104 G0744 2400 2264 94.3% unkn unkn unkn unkn My first Lithium Ion pack! (1 of 2)
Could not re-test, gave it to my mother.
P104 G0744 2400 2276 94.8% 2052 85.5% 1908 79.5% My first Lithium Ion pack! (2 of 2)
P104 0832 3000 2990 99.7% 2242 74.7% 2418 80.6% A rebuild - cells from Makita BL1830
P104 0821 3000 3000 100.0% 2983 99.4% 2865 95.5% A rebuild - cells from Makita BL1830

Several points that I think are of interest from the table above:

What does the discharge curve look like?

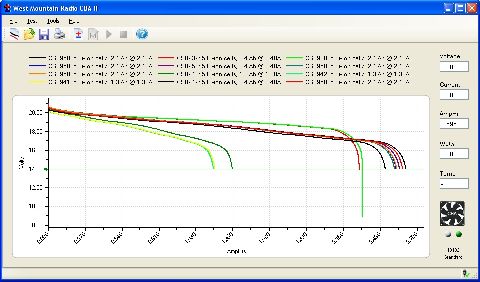
See the chart below for an example of 12 batteries.
The batteries were dischanged at the 1C rate, or 1.3AH for the P103s and 2.4AH for the P104s. When the battery voltage reached 14v the test stopped, which is why the curves don't generally go below 14v. In the above chart you can see three P103s as the shortest lines in light green, yellow, and dark green and ending in the 1200mAh-1350mAh range. The P104s with date codes CS0938 and CS0939 in red and light green end around 2300mAh. All the rest of the curves are the P104s with date codes CS0949 and CS0950, ending in the range beyond 2400mAh. (Update 29-Apr-2010: I received some CS0948 batteries today which also tested above 2400mAh!) To my eye, the shape of the curves of the P103s and the newer P104s is the same, only elongeated for the P104s. They discharge evenly to around 17v (except for the "hump" at 19v) and then drop off rapidly. By contrast, the older P104s seem to hold their voltage a little better, discharging evenly to around 18v before dropping off rapidly.

I don't have a fancy battery tester. How can I test my batteries?

It's possible to get a ballpark figure of you battery's performance by timing how long it takes to discharge in a tool that draws current at a relatively constant rate, like a flashlight or fan. A high draw tool such as a leaf blower or vacuum could also be used, but these not only requires more precise timimg, but the results are likely to be lower than rated (even for a new pack) because of the high discharge rate. The most accurate results will come from a tool for which one expects the discharge to last one hour (or longer). A tool like a drill or saw would be a poor choice because they're not designed to be used for long unloaded, and it would be very difficult to provide a contant load.

It's safer to test Lithium Ion packs than NiCads because of the built-in protective circuitry which prevents the cells from overdischarging. NiCad packs lack this circuitry and can therefore be completely discharged if not monitored carefully. (Note: It's not necessarily harmful to fully discharge a NiCad cell, but with 15 NiCads in series it's unlikely that they're all be completely discharged at the same time. Some cells will discharge before others and may actually "reverse" while others are still discharging and this can be harmful. Ideally you'd want to stop discharging a NiCad cell when it reaches about 0.9v, or 13.5v for a healthy 18v pack.)

You don't need to do this, but I built a special gizmo for timing exactly how long a Ryobi 18v battery operates before it dies. I gutted a dead P104 battery pack and sacrificed a cheap analog watch. I cracked open the watch, removed the 1.5v button cell battery, soldered bell wires to each of the battery contacts, put some heat shrink tubing around the wires, and drilled a small hole through the watch cover for the wires to exit. On the bottom of the pack I mounted a pair of banana plug receptacles (input) and then glued on the watch with the wires entering the pack through a small hole. Inside the pack, I directly connected the inputs to the outputs on the neck of the cell. I also wired in the press-button power gauge. I connected a 47K Ohm resistor and three 1N4007 diodes to the positive (+) side, and that last diode to the negative side (-). (Pretty much any diode would have worked, I picked 1N4007 because I had a spool of 100 lying around in my shop.) The watch battery leads I connected to the negative (-) side and to the junction between the 47K Ohm resistor and the first diode. This battery "shell" plugs into any Ryobi 18v tool.


I then set the time on the watch to just before 12:00. When I connect a Ryobi 18v battery to the input terminals, the watch starts to run. If it's not already on, I switch on the Ryobi tool, then wait. There's about a 0.5v drop across each diode, so as long as the battery has a charge, 1.5v runs the watch (and this circuit draws a negligible 0.4 mA from the pack). When the battery is depleted the Ryobi tool and the watch both stop. So long as the run time is under 12 hours, all I have to do is record the time on the watch to determine how long the battery operated the tool.

See the table below to see how long I have measured that fully charged/healthy battery packs operate various tools.

Tool BatteryRun Time Estimated Draw (mA)
P700 Flashlight P103 2:12 591
P700 Flashlight P104 3:33 676
P703 Flashlight P103 2:15 578
P703 Flashlight P104 3:47 634
P710 Hand Vac P103 00:10:42 7,290
P710 Hand Vac P104 00:17:18 8,324
P715 Spotlight P103 0:50 1,560
P715 Spotlight P104 1:30 1,582
P716 Spotlight P103 00:33:29 2,330
P716 Spotlight P104 00:57:56 2,486
P2000 String Trimmer P103 00:14:17 5,461
P2000 String Trimmer P104 00:22:40 6,353
P2100 Leaf Blower P102 00:07:28 9,642
P2100 Leaf Blower P103 00:09:04 8,603
P2100 Leaf Blower P104 00:12:35 11,444
P2100 Leaf Blower P108 00:22:23 10,722
P3200 Canister Vac P103 00:08:56 8,731
P3200 Canister Vac P104 00:12:45 11,294
P3300 Fan / Low P103 6:46 192
P3300 Fan / High P103 4:08 315
P3300 Fan / Low P104 11:12 214
P3300 Fan / High P104 6:44 358

You can use the table above, a tool, and a clock to get a ballpark figure of your battery's capacity. For the most accurate estimate, select the tool with the lowest draw. For example, say you have a P3300 Fan and a P103 battery. The Fan on Low draws about 200mA and the P103 is rated 1300mAh, so it should run the fan on low for about 1300/200=6.5 Hrs. Now connect your fully charged pack to the fan on low and clock how long it takes before the fan stops. Stop by the fan every 15 minutes or so (during commercial breaks?) and write down the time. When you notice that the fan has stopped running, you know the pack ran out sometime between the last reading and the current time. If you're checking often enough, this should be a good estimate. If your battery is within 10% of the figures above your battery is probably fine. If it operates the tool for significantly less time, you may want to start thinking about getting a new pack. I wouldn't trust results for any device where you determined that the discharge should take less than an hour (e.g., vacuums, leaf blower), I included them here just to demonstrate how much current these devices draw as compared to other tools.

Also, I've noticed that new batteries tend to operate below their full capacity for the first few cycles. If your battery tests within 80% of full capacity on the first discharge cycle, it's probably fine. If you test it again you should notice 5-10% improvement on the second time and even more on the third.

Perhaps you've heard of the "Flashlight Test", which is supported by the data in the above table. According to the "Flashlight Test" a P103 should run a flashlight for 2 hours, a P100 for 3 hours, and a P104 for 4 hours. As per the table above, the P103 should go just over 2 hrs and a P104 just under 4. I don't have a P100 to test, but I'd extrapolate the P100 duration as 1700/600=2.833 hours or just under 3.

Update 06-Aug-2011:
It has occurred to me that the "Flashlight Test" can be reduced into one simple statement:


 A battery's capacity in mAh is 10x a flashlight's run time in minutes. 


The Math:
The bulb in a P700 or P703 flashlight draws 600mA, and there are 60 minutes per hour, so a battery's capacity in mAH is (run time in minutes)/(60 minutes per hour)*(600mA draw rate), which can be reduced to (runtime in minutes) * 10. A fully charged P103 running at full capacity should keep a flashlight lit for 1300mAH/(600mA)*(60 min/hr) = 130 minutes. If the flashlight stays lit for only 90 min, then the battery's capacity is (90 min)/(60 min/hr)*(600mA) = 900mAH.

Bear in mind that the bulb doesn't draw EXACTLY 600mA , but I bet the actual number is within 30mA. So this method should give a measurement of battery capacity to within 5%, which I'd say is pretty darned good.

You may be wondering why the current draw is lower using the P103 battery than using the P104 battery on high-draw tools (e.g., Leaf Blower, Canister Vac). I suspect the problem is that the P103 cannot sustain the high current draw required of these tools. So while a P103 will power every Ryobi 18v tool, it may not power every tool at "full strength". The data for the spotlight shows that the P103 can deliver 1.2C, and the Hand Vac shows that it can deliver about 6C, but the Leaf Blower and Cansiter Vac show that it can't do much better than 6.5C (at least not for a full discharge). So any tool which draws more than the 6C rate for the P103 will not operate at "full strength" when powered by a P103.

In other words, any tool that lasts for less than 10 minutes of continuous use on a P103 is probably not operating at "full strength". Any tool that lasts for more than 10 minutes of continuous use on a P103 will operate longer with a P104, but not with any more "strength".

So what about the discrepancy on the current draw between batteries? I mean, why do the flashlights draw 578/591 mA on a P103 and 634/676mA on a P104? I suspect it's because I used the rated capacity of the batteries and not the measured capacity to calculate the draw rates. The actual capacity of the P103s I used were measured around 101% capacity while the P104s measured at 94% capacity. Using these adjusted numbers, the flashlight draw of the P103s would be 584/599 mA and 602/638 mA. It seems like 638 is an outlier and flashlights draw about 600mA regardless of the battery.

Have you ever modified a Ryobi 18v tool to make a new tool?

Of course! I wish Ryobi would sell a device that converted their 18v batteries to a regulated 12v DC power supply. Then I could operate any portable tool that was designed to operate in a car.

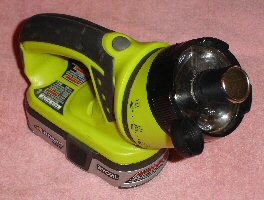
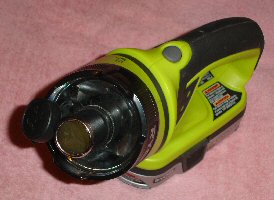
My first stab at this worked pretty well. I sacrificed a Ryobi FL1400 flashlight and mounted a cigarette lighter socket in the lens where the bulb would normally be. I cut off part of the battery end so that it would fit a Sears Craftsman 12v battery pack (same stem as the Ryobi 18v) because at the time I owned drills and a recip based on the Sears 12v pack. This worked well and allowed me to plug in and use a variety of low current 12v devices directly from a 12v pack. Portable cellphone chargers may be commonplace now, but there was no such thing back in the late 90s when I built this. When I moved to Ryobi 18v tools in 2004 I put a simple 7812 voltage regulator in the flashlight to get a steady 12v @1A. While nauseatingly inefficient, it worked. I have since ripped apart the FL1400 and sacrificed a P703 for the same purpose, but this time I used an MC78T12C (12v, 3A). With the P703 mod I get 3x the current and it's far less top heavy so it doesn't topple over.


But I wanted more.

What I really wanted was a regulated 12v supply at 15A, the same current rating as most car cigarette lighters. I tried several designs, all of which failed to supply the desired 15A for more than a minute before overloading. I eventually stumbled across a device known as the 24v DC to 12v DC step-down converter. This is a mass manufactured device (i.e., cheap) that's used to step down the 24v in some trucks, tractors, lorries, etc., to 12v so that typical 12v devices can be used. I remember that most 12v car batteries are charged up to 13.8v, and most 12v devices are designed to cut off around 10v, so I think a vehicle that contains a nominal 24v supply is likely to see a range of voltage from 20-28 during normal operation. I figured that step-down converters must be designed to operate not just at 24v, but over a range below and above 24v. Most manufacturers of these devices do not specify an operating range for the input voltage. Those that do specify a low input voltage of 18v. But that's not good, using a Ryobi 18v battery for input the device would stop operating long before the battery was completely discharged.

Ryobi 18v Lithium Ion packs contain one or two strings of 5 18650 cells, for which the operating voltage is 2.8v-4.2v. Therefore the 18v pack should be at 4.2x5=21v at full charge and 2.8*5=14v when fully discharged. So ideally the 24v to 12v step-down converter's input range should be greater than this range. Luckily I found one vendor selling a device rated for 15A and an input range of 13v-28v (on eBay). It works like a champ! Inside this device are three identical circuit modules connected in parallel, so I assume that each is rated 5A. I gutted an old Ryobi Multivolt charger and fit the guts of this device in it. Sure enough, testing shows that I can draw 12v at 15A from this device when connected to a P104. I haven't tried to draw this much current for more than 5 minutes, but hey, it works!


The next step was to connect a miniature 12v DC to 120v AC power inverter to this thing. Yep, this works, too. I can now operate any 120v device, up to about 150 watts, using just a Ryobi 18v battery for power. I'm short on practical applications, but it sure is a nifty doohickey.


Right now (Dec 2009) I've got it in my truck box, and I use it to power a couple strings of LED Christmas lights that I strung around the bed. My kids love it and it lasts over four hours on one P104 battery without a worry of discharging my truck battery. I use my P131 Dual-Chemistry in-vehicle charger to recharge the battery the next day while I'm driving so it's ready for the next night.

Waitaminit! 15 amps at 12 volts? Can a Ryobi 18v battery safely deliver that much current?

Good question! Let's see, 12v at 15A = 180 watts. So at 18v that's a 10A draw. Assuming 90% efficiency of the DC-DC step-down device (it's a guess, one day I may try to quantitate this) we're talking 198 watts or 11 Amps at 18 volts.

A P104 contains cells rated 10C in parallel, for an effective 20C rating which means 24 Amps. No problem.

A P103 contains cells rated 10C, which means 13 Amps. A little close for comfort, but within specs.

I don't know what the discharge rating is on the cells in the NiCd packs (P100 and older), but I'd guess 10C. For a P100 pack that means 17 Amps and for older packs that's 15 Amps. So we're still within specs.

Main Page    18v Batteries    Battery Chargers    Cordless Tools    Battery Rebuilds, etc. The Ryobi P102 Battery
NEW!   Circular Saw Battery Test


This page brought to you by eBay's TOOLBOY
Click here to check out all of toolboy's items for sale on eBay
Last revised 22-Apr-2016
Count since 22-Oct-2014: